
Table of Contents
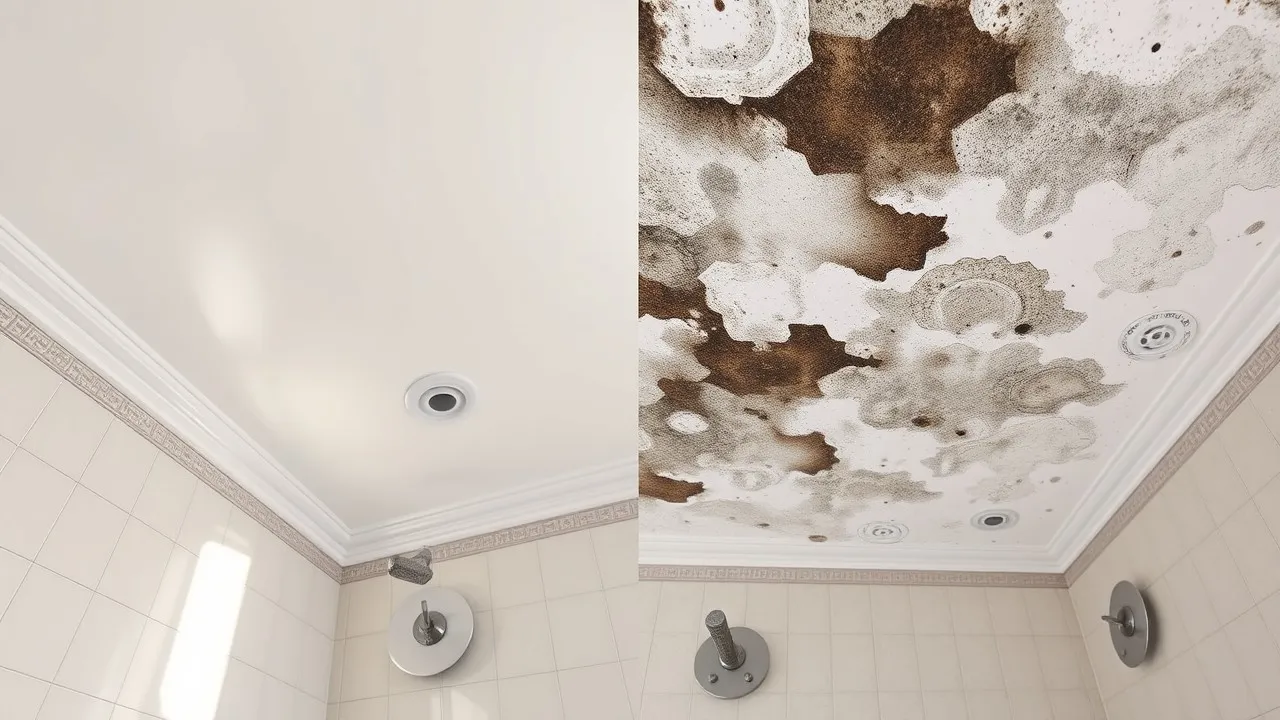
Maintaining a clean bathroom is a top priority for home enthusiasts worldwide. Mold on bathroom ceiling is a common and persistent problem. It doesn’t only make the bathroom look bad but also can harm your health. This guide offers an easy, step-by-step method on how to get rid of mold in bathroom ceiling ensuring a clean and healthy environment. Whether you’re a seasoned DIYer or a novice cleaner, our expert-approved techniques will help you achieve flawless results.
Why Cleaning Mold from Your Bathroom Ceiling Matters
Mold thrives in damp environments, making bathrooms particularly vulnerable to its growth. Besides being visually unattractive, mold can lead to respiratory issues and cause damage to surfaces. Promptly addressing mold not only enhances the appearance of your bathroom but also protects your health and property. Our effective cleaning method utilizes readily available materials and proven techniques to eliminate mold efficiently and prevent its recurrence.
Health Implications of Mold Exposure
According to the Environmental Protection Agency (EPA), “Exposure to mold can result in various health problems, such as allergic reactions including sneezing, a runny nose, irritated red eyes, and skin rashes. For individuals with asthma, exposure to mold can provoke asthma attacks. In addition, mold exposure may irritate the eyes, skin, nose, throat, and lungs, affecting both allergic and non-allergic individuals” (EPA).
Materials and Tools You’ll Need
Before you start, gather the following materials and tools to ensure a smooth and effective cleaning process:
- Protective Gear
- N-95 Mask:
- Purpose: Prevents inhalation of mold spores and airborne particles.
- Recommendations: For optimal protection, ensure the respirator fits snugly over your nose and mouth. Follow the manufacturer’s instructions carefully.
- Gloves:
- Purpose: Shields your hands from direct exposure to mold and harsh cleaning solutions, ensuring safety during the cleaning process.
- Recommendations: Choose gloves that extend to the middle of your forearm for maximum protection.
- Goggles:
- Purpose: Shields your eyes from mold spores and cleaning chemicals.
- Recommendations: Use goggles without ventilation holes to prevent mold particles from entering. Ensure a secure fit to avoid any gaps where mold spores could penetrate.
- N-95 Mask:
- Cleaning Solutions
- White vinegar or hydrogen peroxide
- Baking soda
- Dish soap
- Tools
- Spray bottle
- Soft-bristled brush or sponge
- Ladder or step stool
- Cleaning cloths or microfiber towels
- Bucket
- Mold-resistant paint for prevention
Step-by-Step Guide to Cleaning Mold from a Bathroom Ceiling
Removing mold from your bathroom ceiling involves a systematic approach to ensure thorough elimination and prevention of future growth. Follow these detailed steps to achieve a clean and healthy bathroom environment.
Step 1: Check Plumbing Installation
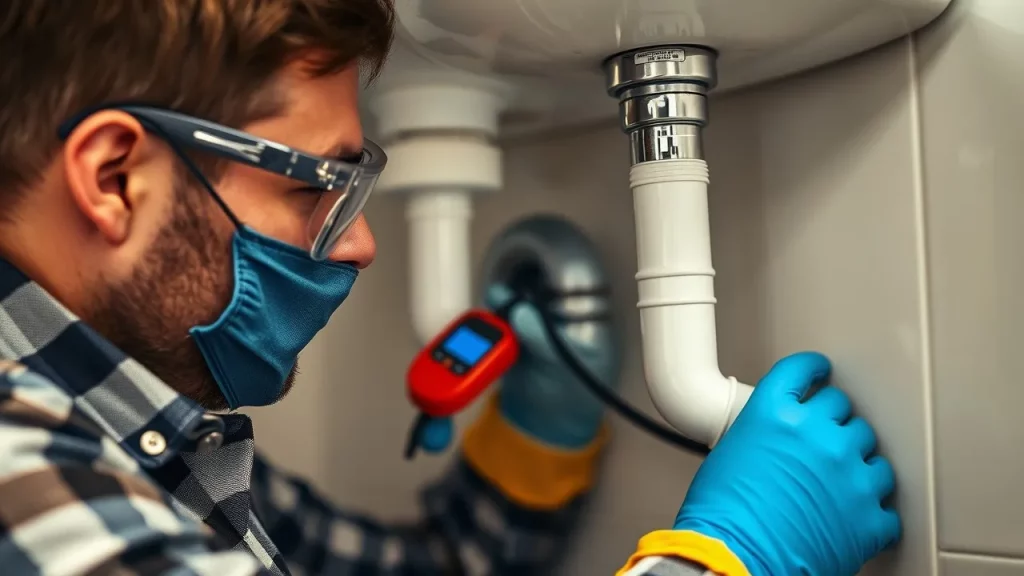
Action: Inspect all plumbing fixtures and installations in your bathroom for leaks or water damage. Look for signs of dripping pipes, damp spots, or water stains on walls and ceilings. Address any plumbing issues before proceeding with mold removal.
Why It Matters: Plumbing leaks and water damage create the moist environment that mold needs to thrive. By fixing these issues first, you prevent further mold growth and ensure that your cleaning efforts are effective and long-lasting.
Step 2: Prepare Your Workspace
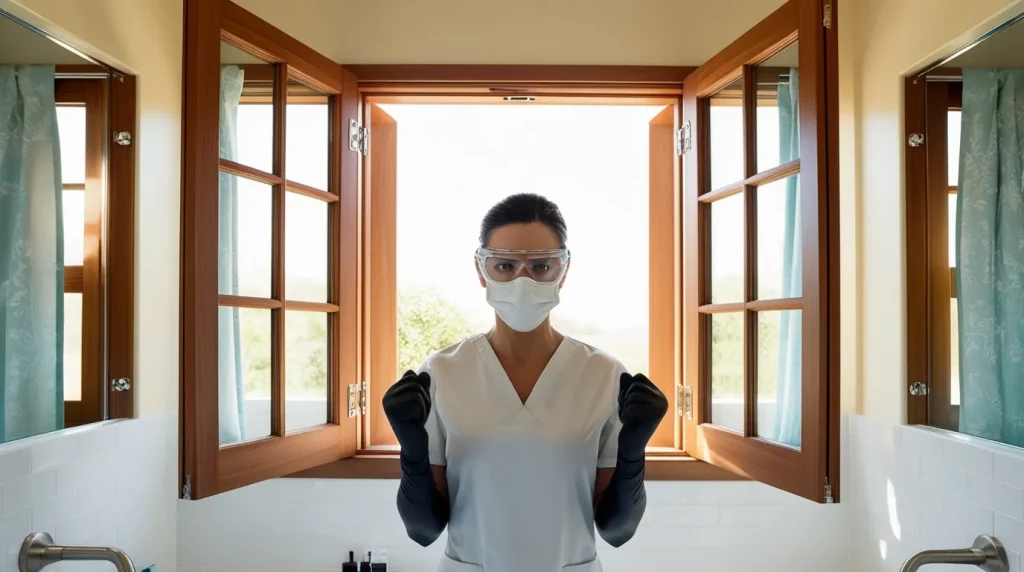
Action: Ensure proper ventilation by opening windows and turning on the bathroom fan. Wear protective gear, such as gloves and a mask, to shield yourself from mold spores and cleaning solutions.
Why It Matters: Proper ventilation minimizes exposure to harmful fumes and mold spores, ensuring a safer and more effective cleaning process.
Preparation Steps:
- Ventilate the Area: Open windows and doors to promote airflow and allow fresh air to circulate throughout the space.
- Protect Yourself: Wear an N-95 respirator, long gloves, and goggles to protect against inhaling mold spores and coming into contact with cleaning agents.
- Cover Surrounding Areas: Use plastic sheets or old towels to cover nearby surfaces and fixtures to prevent contamination.
- Remove Personal Items: Take down any artwork, mirrors, or other items from the ceiling and surrounding areas to avoid exposure and facilitate cleaning.
Step 3: Mix Your Cleaning Solution
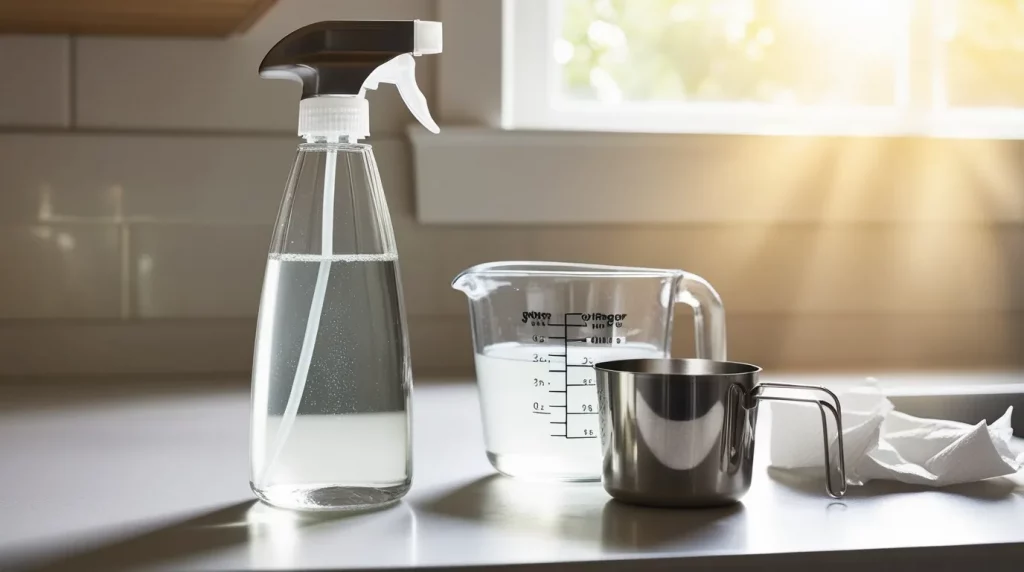
Preparing an effective cleaning solution is crucial for successfully cleaning mold from the bathroom ceiling. In this step, you’ll mix a powerful yet safe solution using either white vinegar or hydrogen peroxide, both known for their mold-fighting properties. Here’s a detailed breakdown of how to prepare your cleaning solution and why each ingredient works so well:
Choosing the Right Cleaning Agent
- White Vinegar:A natural, non-toxic solution that kills over 80% of mold species by using its acidic nature to break down mold structures. It’s environmentally friendly, safe for most surfaces, and doesn’t release harsh fumes, making it ideal for those sensitive to chemicals.
- Hydrogen Peroxide: A potent oxidizer that not only kills mold but also bleaches and deodorizes affected areas, particularly effective against black mold. It disinfects surfaces, leaving them sanitized.
Mixing the Solution
Option 1: White Vinegar Solution
- Ingredients:
- 1 part white vinegar
- 1 part water
- Instructions:
- Measure the Vinegar and Water: Mix 1 cup of white vinegar with 1 cup of water. This equal ratio ensures maximum effectiveness while maintaining a safe concentration.
- Combine in a Spray Bottle: Pour the measured vinegar and water into a clean spray bottle. Using a spray bottle allows for easy and even application across the moldy ceiling area.
- Shake Gently: Secure the spray bottle cap and shake gently to ensure the vinegar and water are thoroughly mixed.
Option 2: Hydrogen Peroxide Solution
- Ingredients:
- 1 part hydrogen peroxide (3% concentration)
- 1 part water
- Instructions:
- Measure the Hydrogen Peroxide and Water: Mix 1 cup of hydrogen peroxide with 1 cup of water. The 3% concentration is effective for household mold removal.
- Combine in a Spray Bottle: Pour the hydrogen peroxide and water mixture into a clean spray bottle for easy application.
- Shake Gently: Secure the spray bottle cap and shake gently to ensure the solution is well combined.
Step 4: Apply the Cleaning Solution
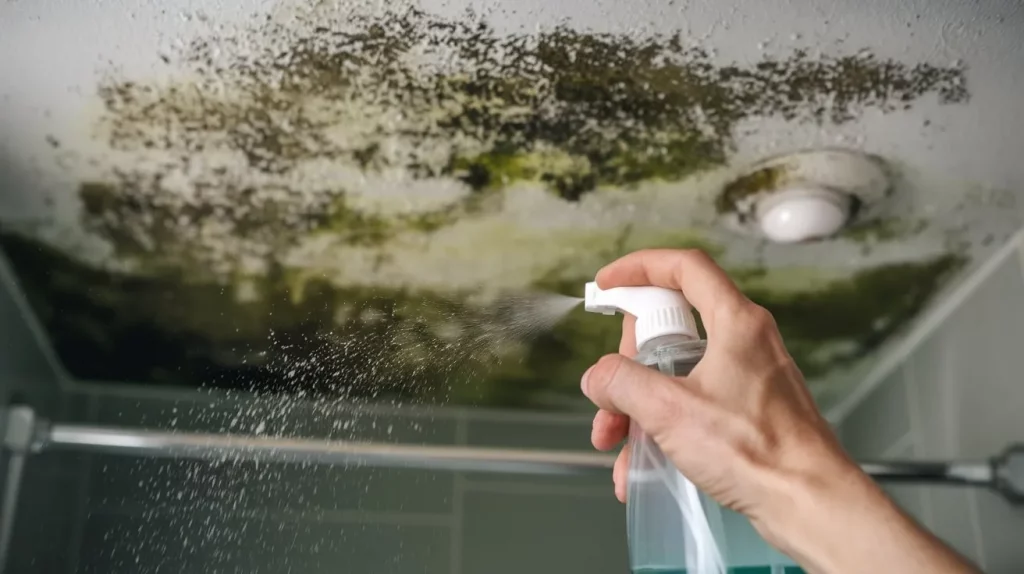
Action: Apply a generous amount of your chosen solution to the mold-affected areas of the bathroom ceiling. Allow it to sit for 10-15 minutes to thoroughly soak into and break down the mold.
Why It Matters: Letting the solution sit gives it time to break down the mold’s structure, which makes the mold easier to remove during cleaning.
Application Tips:
- Even Application: Use the spray bottle to distribute the solution evenly across the moldy areas. Ensure thorough coverage to maximize the solution’s effectiveness.
- Dwell Time: Allow the solution to sit undisturbed for at least 10-15 minutes. This dwell time is essential for the cleaning agent to penetrate and kill the mold spores.
- Reapplication: For severe mold infestations, you may need to reapply the solution and extend the dwell time to ensure complete eradication.
Step 5: Clean the Moldy Surface
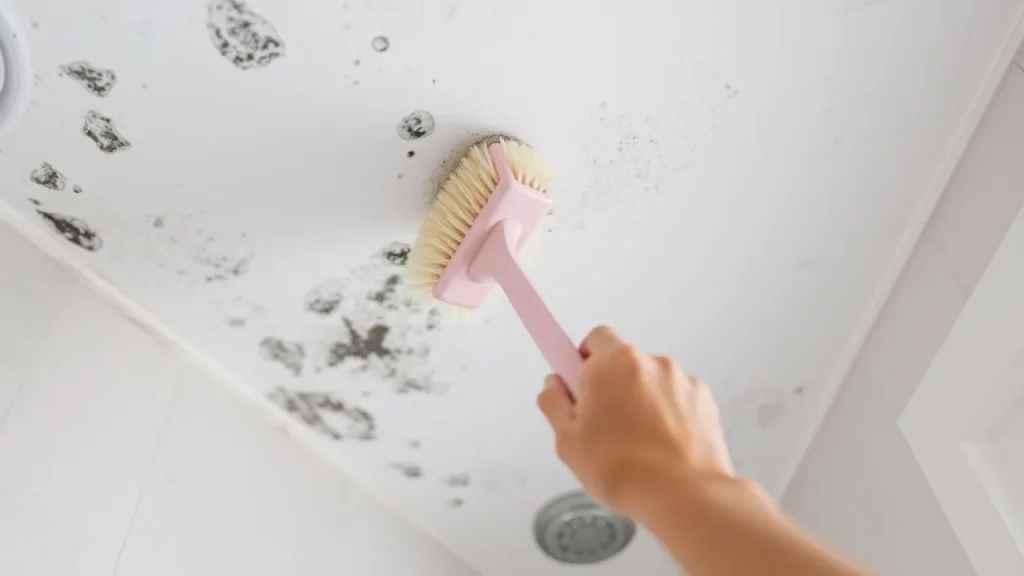
Action: With a soft-bristled brush or sponge, carefully scrub the mold-affected areas. For tougher mold, make a paste with baking soda and water, apply it to the area, and then scrub.
Why It Matters: Scrubbing removes the mold, while baking soda acts as a mild abrasive to lift it and also helps eliminate any unpleasant smells.
Cleaning Techniques:
- Soft-Bristled Brush:
- Use: Ideal for scrubbing mold from ceiling tiles and painted surfaces without causing damage.
- Technique: Gently brush the moldy areas in circular motions to lift and remove the mold.
- Sponge Method:
- Use: Suitable for larger, less severe mold patches.
- Technique: Wipe the area with a sponge soaked in the cleaning solution, applying firm pressure to remove mold.
- Baking Soda Paste:
- Ingredients:
- 1/2 cup baking soda
- 3/4 cup water
- Instructions:
- Mix: Blend baking soda with water until a thick paste forms.
- Apply: Evenly spread the paste over the areas with stubborn mold.
- Scrub: Use a brush or sponge to scrub the paste into the mold, enhancing its removal.
- Rinse: Use a damp cloth to wipe away the paste thoroughly.
- Ingredients:
Additional Tips:
- Avoid Harsh Scrubbing: While it’s important to remove mold, avoid using abrasive materials that can damage the ceiling surface.
- Consistent Pressure: Apply consistent pressure while scrubbing to ensure thorough removal without causing streaks or damage.
- Check for Residual Mold: After scrubbing, inspect the area for any remaining mold. Reapply the cleaning solution and scrub again if necessary.
Step 6: Rinse and Dry
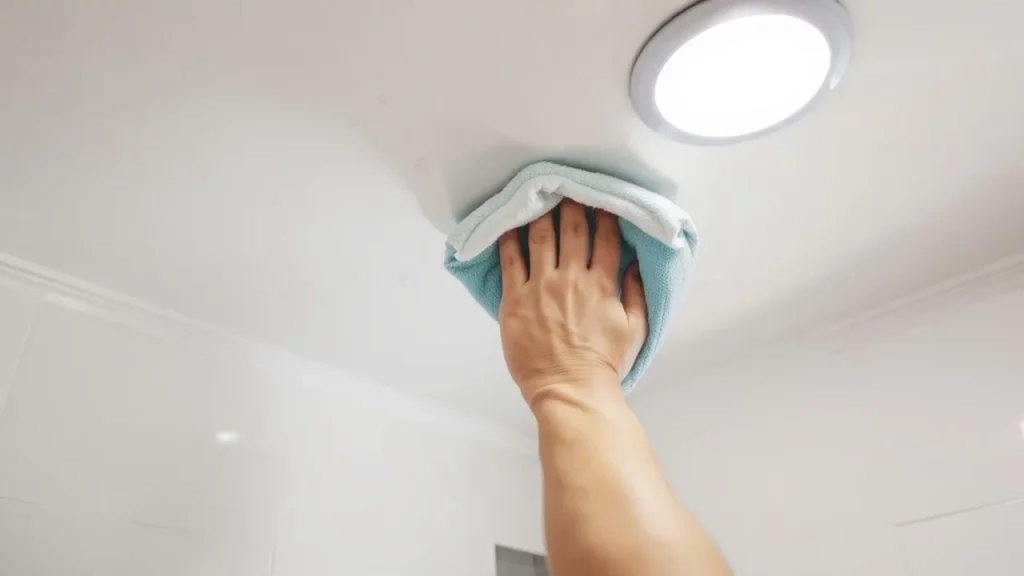
Action: Wipe the cleaned area with a damp cloth to remove any residual cleaning solution and mold remnants. Use a dry cloth or towel to thoroughly dry the ceiling.
Why It Matters: Removing all cleaning agents and ensuring the area is dry prevents mold from returning and keeps your ceiling pristine.
Rinsing Steps:
- Dampen a Cloth: Lightly wet a clean cloth or microfiber towel with water.
- Wipe Down: Gently wipe the entire cleaned area to remove any leftover cleaning solution and loosened mold particles.
- Dry Thoroughly: Use a clean, dry cloth or towel to soak up any remaining moisture.
Drying Tips:
- Use Fans: Place fans strategically to improve airflow and accelerate the drying process.
- Natural Airflow: Keep windows open to allow natural ventilation, which aids in drying.
- Dehumidifier: Running a dehumidifier in the bathroom can effectively reduce moisture levels, promoting faster drying and inhibiting mold growth.
Step 7: Prevent Future Mold Growth
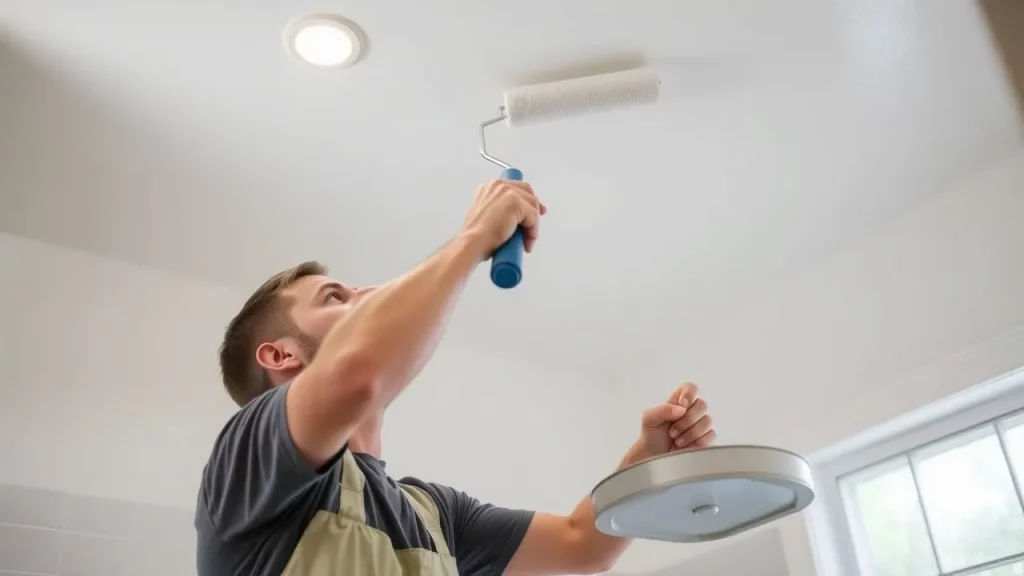
Action: After cleaning, consider applying mold-resistant paint to the ceiling. Additionally, use a dehumidifier to reduce moisture levels in the bathroom.
Why It Matters: Preventative measures create an inhospitable environment for mold, ensuring long-term cleanliness and health safety.
Helpful Tips and Variations for Effective Mold Removal
Enhance your mold removal efforts with these additional tips and alternative methods. These variations cater to different preferences and situations, ensuring that you have a range of solutions at your disposal.
1. Ensure Proper Ventilation
- Tip: Regularly use exhaust fans or open windows during and after showers to minimize moisture buildup.
- Benefit: Reducing humidity levels significantly decreases the likelihood of mold growth.
- Ventilation Strategies:
- Use Exhaust Fans Effectively: Turn on the bathroom exhaust fan before, during, and after taking a shower to remove excess moisture.
- Open Windows: When feasible, open windows to promote air circulation and lower humidity levels.
- Install Additional Ventilation: In bathrooms with poor ventilation, consider installing additional vents or fans to improve airflow.
- Use Ventilation Fan Timers: Set timers to keep exhaust fans running for a sufficient period after showering to ensure all moisture is removed.
2. Regular Maintenance
- Tip: Incorporate mold inspection into your regular cleaning routine to catch and address mold early.
- Benefit: Early detection prevents extensive mold growth and makes cleaning easier.
- Maintenance Practices:
- Monthly Inspections: Check for signs of mold in high-moisture areas like ceilings, corners, and behind fixtures.
- Immediate Action: Clean any small mold patches immediately to prevent them from spreading.
- Maintain Cleanliness: Keep the bathroom clean and dry by regularly wiping down surfaces and removing any standing water.
- Monitor Humidity Levels: Use a hygrometer to monitor bathroom humidity and take action when levels exceed 60%.
3. Use a Dehumidifier
- Tip: Place a dehumidifier in your bathroom to keep humidity levels in check, especially in areas prone to moisture accumulation.
- Benefit: Maintaining lower humidity levels (between 30% and 50%) makes your bathroom less conducive to mold growth, promoting a healthier environment.
- Dehumidifier Usage Tips:
- Choose the Right Size: Select a dehumidifier appropriate for the size of your bathroom to ensure effective moisture control.
- Regular Maintenance: Clean and empty the dehumidifier regularly to maintain its efficiency.
- Continuous Operation: For bathrooms with persistent moisture issues, consider running the dehumidifier continuously or setting it to operate automatically based on humidity levels.
4. Install Proper Lighting
- Tip: Good lighting can help you spot mold growth early and reduce damp areas where mold can thrive.
- Benefit: Enhanced visibility allows for timely intervention, preventing minor mold issues from becoming major problems.
- Lighting Enhancements:
- Bright LED Lights: Install bright, energy-efficient LED lights to illuminate all areas of the bathroom ceiling effectively.
- Motion-Activated Lights: Consider motion-activated lighting to ensure the bathroom is well-lit when in use.
- Natural Light: Maximize natural light through windows or skylights to reduce moisture accumulation and inhibit mold growth.
5. Keep Surfaces Dry
- Tip: After using the bathroom, wipe down wet surfaces such as the shower walls and ceiling to remove excess moisture.
- Benefit: Keeping surfaces dry minimizes the moisture available for mold to grow, maintaining a cleaner space.
- Drying Techniques:
- Use Squeegees: After each shower, use a squeegee to remove water from walls and ceilings.
- Dry Towels: Keep absorbent towels handy to wipe down wet surfaces promptly.
- Air Dry: Allow surfaces to air dry by keeping doors and windows open after showering to facilitate moisture evaporation.
Common Mistakes to Avoid
Successfully removing mold requires careful attention to detail and adherence to best practices. Avoid these common mistakes to ensure effective and safe mold remediation.
1. Ignoring Safety Precautions
Mistake: Neglecting to wear protective gear or failing to ventilate the area properly.
Solution: Always wear appropriate protective equipment, including respirators, gloves, and goggles. Ensure the bathroom is well-ventilated by opening windows and using exhaust fans during and after the cleaning process.
2. Using Bleach as a Primary Solution
Mistake: Relying solely on bleach to kill mold.
Solution: While bleach can kill surface mold, it is not effective on porous materials and does not prevent mold from returning. Opt for vinegar or hydrogen peroxide, which are more effective in penetrating and eliminating mold colonies.
3. Not Addressing the Source of Moisture
Mistake: Cleaning mold without fixing underlying moisture issues.
Solution: Identify and repair any plumbing leaks or ventilation problems before cleaning mold to prevent it from reappearing. Ensuring a dry environment is crucial for long-term mold prevention.
4. Overlooking Hidden Mold
Mistake: Focusing only on visible mold and neglecting hidden areas.
Solution: Inspect areas behind fixtures, under sinks, and inside ceiling tiles for hidden mold growth. Address all affected areas to ensure complete mold removal.
5. Rushing the Cleaning Process
Mistake: Hastily cleaning mold without allowing sufficient dwell time for the cleaning solution to work.
Solution: Apply the cleaning solution generously and allow it to sit for the recommended 10-15 minutes to effectively break down mold structures before scrubbing.
6. Inadequate Drying
Mistake: Failing to dry the cleaned area thoroughly after removal.
Solution: Use fans, dehumidifiers, and proper ventilation to ensure the ceiling is completely dry. Moisture is a primary catalyst for mold growth, so thorough drying is essential.
7. Repainting Without Treating Mold
Mistake: Applying new paint over mold-infested areas without proper treatment.
Solution: Treat and remove all mold before applying mold-resistant paint. Painting over mold can trap it, leading to further growth and structural damage.
8. Using Abrasive Cleaning Tools
Mistake: Scrubbing mold with harsh or abrasive tools that can damage the ceiling surface.
Solution: Use soft-bristled brushes or sponges to scrub mold gently without harming the ceiling. For stubborn mold, use a baking soda paste as an abrasive yet safe alternative.
9. Neglecting Regular Maintenance
Mistake: Cleaning mold once and not maintaining the bathroom to prevent recurrence.
Solution: Incorporate regular inspections and maintenance into your cleaning routine. Ensure proper ventilation, control humidity levels, and promptly address any signs of moisture or mold.
10. Not Seeking Professional Help When Needed
Mistake: Attempting to handle extensive mold infestations without professional assistance.
Solution: Recognize the limits of DIY methods and seek professional help for large-scale or persistent mold problems to ensure thorough and safe remediation.
Frequently Asked Questions (FAQs)
Addressing common questions can further assist your readers and enhance the value of your guide.
1. Can mold on the bathroom ceiling be harmful to my health?
Yes, mold can cause various health issues, including allergic reactions, respiratory problems, and skin irritation. Prolonged exposure can be particularly harmful to individuals with asthma or weakened immune systems.
2. How quickly can mold develop on a bathroom ceiling?
Mold can start developing within 24 to 48 hours in damp environments. Factors such as humidity levels, ventilation, and the presence of moisture contribute to the speed of mold growth.
3. Is it safe to handle mold removal on my own, or is it better to hire a professional?
For small to moderate mold infestations, DIY methods are generally safe and effective if proper precautions are taken. However, for large-scale or hidden mold problems, it is advisable to hire a professional to ensure thorough removal and prevent health risks.
4. What steps can I take to stop mold from coming back after cleaning?
Prevent mold recurrence by controlling moisture levels through proper ventilation, using dehumidifiers, fixing leaks promptly, and applying mold-resistant paint. Regular maintenance and inspections also help in early detection and prevention.
5. Can I use bleach to remove mold from my bathroom ceiling?
While bleach can kill surface mold, it is not effective on porous materials and does not prevent mold from returning. It is better to use vinegar or hydrogen peroxide for more effective mold removal and prevention.
6. What should I do if mold keeps coming back despite my cleaning efforts?
Persistent mold growth indicates underlying moisture issues that need to be addressed. Inspect for leaks, improve ventilation, and consider consulting a professional to identify and fix the root cause of mold recurrence.
7. Are there eco-friendly options for removing mold?
Yes, natural remedies like white vinegar, hydrogen peroxide, baking soda, and lemon juice are effective and eco-friendly alternatives to chemical-based mold removers.
8. How can I determine if all the mold has been fully eliminated?
Once cleaning is complete, carefully inspect the area for any lingering signs of mold. The ceiling ought to exhibit no traces of discoloration, appearing uniformly clean and dry. Additionally, ensure that the area remains dry to prevent future growth.
9. Can mold damage the structural integrity of my bathroom ceiling?
Yes, mold on bathroom ceiling can weaken the structural components of your bathroom ceiling, including paint, plaster, and wooden beams. Prolonged mold growth can lead to significant structural damage, necessitating costly repairs.
10. What are the health symptoms of mold exposure?
Common symptoms include sneezing, runny nose, red eyes, skin rashes, asthma attacks, and irritation of the eyes, skin, nose, throat, and lungs. In severe cases, prolonged exposure can lead to more serious respiratory issues.
Conclusion: Take Action Today for a Mold-Free Bathroom
Cleaning mold on bathroom ceiling doesn’t have to be a daunting task. With the right materials, tools, and techniques, you can achieve a spotless and healthy bathroom environment. Follow our step-by-step guide on how to get rid of mold on bathroom ceiling, implement preventative measures, and enjoy a mold-free ceiling all year round. If you found this guide helpful, share it with fellow home enthusiasts or leave a comment below with your mold on bathroom ceiling removal experiences and tips!
References
- Environmental Protection Agency (EPA). A Brief Guide to Mold, Moisture and Your Home. Accessed October 19, 2024.